
You’ve had a trail camera watching a deer trail for two weeks. The photos show several does using the same route, and a buck has appeared there more than once during daylight. It’s the kind of activity you were hoping to find before hunting season.
Now comes a different question: where should you actually hunt?
There’s a field edge nearby where you could tuck a ground blind into the brush. Farther into the timber are several trees that might work for a saddle or treestand. All three options could put you near the deer, but that doesn’t mean all three will give you the same opportunity.
Finding a productive deer trail is only the beginning. The next step is matching the movement you’ve recorded with the terrain, prevailing wind, access route, and shooting conditions. That’s where trail camera information becomes genuinely useful.
Read the Deer Movement Before Picking a Setup
The first mistake is treating every trail camera photo as equally useful.
A camera might capture deer every night along a field edge, but if nearly all those pictures are taken well after legal shooting hours, placing a stand directly over that spot may not accomplish much. Daylight activity is usually more relevant when deciding where to hunt.
Look at the timestamps from the past week or two, particularly when deer have appeared during legal shooting hours. Are those sightings becoming more frequent, or was one daylight photograph an exception? A recent pattern can be more useful than a pile of older images, especially when food sources, weather, or hunting pressure have changed.
Direction matters, too. If a camera catches deer moving toward a field in the evening, that may suggest a route between daytime cover and feeding areas. But a single picture doesn’t establish where the deer started or where they’re going. Consecutive images, cameras at nearby locations, tracks, and other field sign can help complete the picture.
This is where trail cameras for deer hunting become more than tools for collecting pictures. Comparing activity across locations and dates can help identify which routes deserve closer attention and which are mainly used after dark.
Before choosing a blind or climbing a tree, try to answer a more useful question: where is the deer most likely to pass during legal hunting hours, under conditions that allow you to approach and hunt without being detected?
That location may be different from where your camera is hanging.
When a Ground Blind Makes More Sense
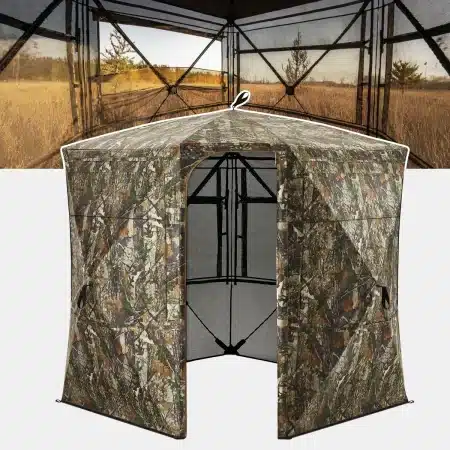
Suppose your camera shows deer regularly following a brushy edge between timber and an agricultural field. A few of those movements occur before sunset, but the surrounding trees are small, poorly positioned, or unsuitable for an elevated setup.
A ground blind might be the practical choice.
You can place it within existing cover while keeping the expected deer route in view. In areas with fence rows, tall grass, or dense shrubs, a blind may fit the landscape better than forcing a treestand into the nearest available tree.
However, being close to a productive trail doesn’t guarantee the blind will work.
A newly placed pop-up blind can stand out, particularly in open areas where deer are familiar with their surroundings. If possible, position it well before the hunt and blend it into existing vegetation without obstructing the intended shooting window. On public land, check whether blinds may be installed or left unattended.
Wind also deserves attention. Hunting at ground level places your scent closer to the routes deer may use. A blind can conceal your movement, but it doesn’t eliminate the need for a favorable wind.
For crossbow hunters, there’s another important consideration: shooting space. The blind must provide enough room to shoulder and aim the crossbow without the limbs striking the window frame, fabric, or surrounding brush when fired. Practice from the actual seated position, since it may feel quite different from shooting at a range.
A ground blind is often worth considering when the camera evidence points toward an accessible field edge or open transition zone, but the terrain offers few suitable elevated positions.
When a Tree Saddle Offers More Flexibility
Now imagine the cameras tell a slightly different story.
Deer are moving through a wooded transition area, but they aren’t consistently using one trail. Recent photos show activity along several nearby routes, and the most promising position may change depending on wind direction or how deer approach the cover.
This is where a tree saddle can be useful.
Unlike a stand left in one location, a saddle system is designed for mobile hunting. An experienced hunter can carry the equipment into an area and choose a suitable tree based on the most recent scouting information.
That flexibility can matter when deer activity shifts. Rather than repeatedly hunting a stand that no longer overlooks the better route, the hunter can consider another position that provides a more favorable approach and shooting angle.
But mobility doesn’t automatically make a saddle the best choice.
The tree still needs to be safe and suitable, and the hunter must be comfortable using the climbing and attachment equipment. Getting into position quietly takes practice. So does using a crossbow while supported by a saddle.
A crossbow may be easier to hold ready than a vertical bow in some situations, but the stock, limbs, tether, and tree trunk can restrict certain shooting angles. A position that looks promising from the ground may offer an awkward shot once you’re attached to the tree.
The main advantage of a saddle isn’t that it works everywhere. It’s that an experienced, properly equipped hunter has more freedom to respond when scouting evidence favors a different location.
When a Treestand Is Worth Committing To
Not every deer trail requires a mobile approach.
Suppose two cameras repeatedly record deer using a narrow woodland corridor. Several recent sightings occur during legal hunting hours, and field scouting confirms a defined route through the cover.
If there’s a suitable tree nearby, a treestand may make sense, especially on property you expect to hunt repeatedly.
An established stand lets you plan your approach, practice shooting from a consistent position, and become familiar with the surrounding terrain. You can identify likely shooting lanes and range landmarks before the season rather than making those decisions during an encounter.
That consistency can be valuable when the deer movement itself is reasonably predictable.
Still, the best tree isn’t necessarily the one closest to the trail.
A stand directly overlooking the camera may force you to cross the deer route on your way in. Another tree farther away might offer a cleaner entry, better concealment, or a more favorable wind.
For crossbow hunting, pay close attention to the actual shooting position. Check whether the tree trunk, branches, or stand components interfere with aiming or limb clearance. Practice from the elevated angle and confirm that the distance and shot presentation remain within your demonstrated ability.
Any elevated setup also brings additional safety responsibilities. Use the fall-protection equipment appropriate to the system, remain properly secured while climbing and hunting, and follow the manufacturer’s instructions for raising and handling your crossbow.
A treestand is a strong option when the activity pattern, safe tree, wind, and access route come together—not simply because the camera has captured plenty of deer.
The Final Check: Wind, Access, and a Realistic Shot
Once you’ve narrowed down the setup, return to the location and look at it from the hunter’s perspective rather than the camera’s.
Imagine you’ve selected a treestand near the woodland corridor. The photographs look promising, but the only convenient approach crosses the trail deer use before daylight. By the time you reach your tree, you may have disturbed the very area you’re hoping to hunt.
Or perhaps the wind is suitable while you’re in the stand but carries your scent across the same corridor as you walk in.
Those problems won’t necessarily appear in trail camera photographs.
The same principle applies to ground blinds and saddles. A well-concealed blind is of limited value if deer usually pass beyond your effective range. A perfectly placed saddle won’t help if the likely shooting direction is blocked by the trunk or requires an unsafe maneuver.
Before committing, check the approach, expected wind and local air movement, available shooting lanes, and the distances from the position you’ll actually use. Make sure you can identify the target and what’s beyond it. Never assume that an animal appearing within camera range will also offer a safe, ethical crossbow shot.
It’s also worth revisiting your camera records as the season progresses. A route that was productive in early fall may change as food availability, breeding behavior, and hunting pressure shift. Recent evidence should guide adjustments, but it shouldn’t override what you observe on the ground.
Sometimes the right decision is to use another setup. Other times, it’s to wait for better conditions or look for a different location altogether.
Let the Deer Movement Guide the Decision
A trail camera can help you find deer, but it can’t choose the right hunting setup for you.
A brushy field edge without suitable trees may favor a ground blind. Several changing routes through timber may make a mobile saddle worth considering. A consistent woodland corridor with a safe tree and clean access may justify a treestand.
None of those choices should be automatic.
The goal is to use recent camera evidence to narrow your options, then let wind, terrain, access, safety, and your ability with a crossbow determine what actually works. The best setup is the one that gives you a realistic opportunity without forcing a shot or disturbing the deer before the hunt begins.
Per our affiliate disclosure, we may earn revenue from the products available on this page. To learn more about how we test gear, click here.