- Crossbow Magazine")
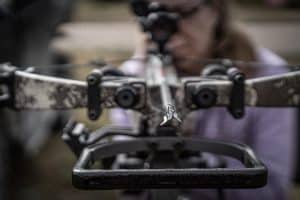
A properly sighted-in crossbow is the foundation of ethical hunting and tight groupings on the practice range. Most modern crossbows come equipped with some form of optic, from a simple red dot to a sophisticated laser range-finding scope with adjustable magnification. Whether you’re stepping into the world of archery for the first time or are a seasoned hunter upgrading to a new scope, understanding the sight-in process is critical for consistent, kill-zone precision. Modern crossbows shoot faster and flatter than ever—but they also demand more exact calibration to match their potential. This field-tested guide walks you through exactly how to sight in a crossbow, the right way.
What You Need to Sight in a Crossbow
Before you start firing bolts downrange, gather these essentials:
-
A safe shooting range: Start with a clear 10 to 50-yard range. A controlled environment (like a backyard or range) is best. This is a good time to make a personal decision on what will be your maximum ethical shot distance while hunting. It’s fun to sling arrows out to 100+ yards on a range, but to think this is possible in most hunting situations is very questionable in the opinion of the author. Luke Clayton provides more information for a hunter in his well-researched story on How Far is Too Far.
Subscribe to Our Newsletter -
Benchrest or Shooting rest: A stable platform eliminates shooter error during the zeroing process. You can use a table with a shooting rest, a tripod or bipod, or some of the available crossbow shooting rests on the market. The most important issue is the ability to shoot consistently. Don’t underestimate trigger pull techniques, as they will affect your overall accuracy similarly to the way they affect rifle accuracy.
-
Allen wrenches, Threadlock, and Torque wrenches: For adjusting scope mounts and turrets. I like to remount my scope if it comes mounted from the factory, using best practices for scope mounting, similar to those used with a rifle scope. Be sure to use threadlock to ensure your scope screws stay in place during transport and use in the field. Ensure you are using the manufacturer’s recommended torque specifications to secure the scope without causing damage.
-
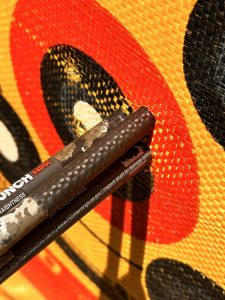
High-contrast target: There are many great options for targets. The author likes ones with multiple aiming points on each face. This is due to the incredible accuracy that most crossbows can deliver. If you shoot arrows at the same aiming point, you may well destroy many expensive arrows, as groupings can be close enough to “William Tell” arrows.

Be careful shooting at the same aim point on a target as you can William Tell expensive arrows -
Rangefinder: Accurate yardage is crucial when confirming reticle drop compensation.
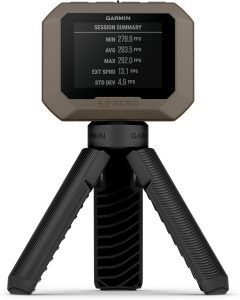
- Chronograph: This is a nice option to fine-tune arrow speed adjustment on many of the better crossbow scopes. The Garmin Xero C1 Pro is my go-to instrument.

Garmin Xero C1 Chronograph
Pro Tip: Use field points during sight-in and practice. Broadheads fly differently and should only be fine-tuned after zeroing with practice bolts. I label the veins on my practice arrows A, B, C… and my hunting arrows 1,2,3… and keep them separate. I only shoot my hunting arrows once or twice with my prefered broadhead to confirm accuarcy just prior to going into the field.
Understanding Crossbow Scope Reticles
Most crossbows come equipped with one of two types of scopes:
Multi-Reticle Scopes
These scopes feature stacked crosshairs or dots, typically pre-marked for 20, 30, 40, 50 yards, and more. Accuracy relies on matching your bolt speed to these intervals.

Speed Ring Scopes
These let you dial in your crossbow’s speed, typically from 275 to over 500 FPS, which adjusts the reticle spacing internally. This type must be calibrated to your specific crossbow’s bolt speed for accurate trajectory.

Pro Tip: Use a chronograph or consult your crossbow’s manual to find the exact FPS of your bolts for optimal reticle calibration. Many crossbows come with a tag showing speed from the factory. Our experience is that many crossbows shoot slightly slower than the advertised/rated speed versus actual speed.
Step-by-Step: How to Sight In Your Crossbow
1. Start at 10 Yards
Set up your crossbow on a rest and shoot a group of 2–3 bolts at 10 yards using the topmost reticle. Adjust windage (left/right) and elevation (up/down) using your scope turrets.

2. Zero in Your Top Reticle or Dot
Once you’re hitting the bullseye at 10 yards, move to 20 yards. Use the top reticle again and fine-tune your adjustments.
3. Move Back to 20 Yards
This is a common zero range for many scopes. All other reticles are calibrated from this baseline. Confirm you’re grouping consistently at this range.
4. Confirm Drop Compensation at 30–40–50 Yards
Move back incrementally and shoot from each range. A rangefinder is critical here because a slight difference in range will affect the impact point noticeably. At this point, you should be adjusting only the Elevation, and your Windage should be closely centered on the vertical axis of your target. If not, return to 20 yards and re-zero to verify. Your lower reticles should line up with the bolt impact at these distances. If not, recheck your speed setting and bolt weight.
5. Fine-Tune Windage and Elevation
Repeat groups from each range to ensure consistent impact across all distances. Make micro-adjustments as needed—don’t chase a single bolt, look for group trends.
Pro Tip: Field-test your setup under hunting-like conditions: shoot from a kneeling position, offhand, or elevated stand to both practice and verify accuracy. I like the flexibility of a portable shooitng rest like the TruGlo Hipshot
Common Mistakes When Sighting In a Crossbow
Not Anchoring Consistently
Always use the same cheek weld and grip. Inconsistent form = inconsistent impact. Think “Rifle” because many of the techniques are the same, without the recoil.
Skipping Speed Calibration
Neglecting to dial in your scope’s FPS rating can lead to large vertical errors at longer distances. While it is not imperative to have a Chronograph, it helps to speed the process. Without a Chronograph, you can make slight adjustments to your speed dial on the scope and arrive at an accurate zero by trial and error. Make your adjustments slight and don’t overcompensate.
Not Using Field Tips
Broadheads don’t fly the same as practice points. Always sight in with field tips, then test broadheads separately afterward.
Tips for Maintaining Accuracy After Zeroing
-
Re-check after transport: Scopes can shift after a bumpy ride. Always fire a test shot before hunting.
-
Use identical bolts: Weight and spine stiffness differences between bolts can throw off your Point of Impact (POI)
-
Mind the environment: Temperature, elevation, and humidity all affect arrow trajectory. Re-zero if conditions change significantly. Practice in the rain or in adverse conditions to give you confidence and peace of mind when the moment of truth presents itself in the field. Also, practice in the gear you plan to hunt with, including heavy camo and packs.
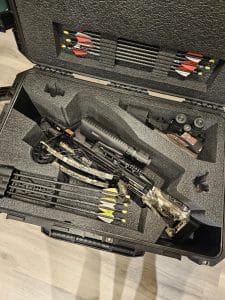
- Transport your Crossbow in a Protective Case: Select a case appropriate for the type of transport, whether in your vehicle or in a luggage compartment of an airplane. It is worth protecting your investment in the crossbow and the hours of preparation you have put into making this ready for the hunt.

SKB Cases have plenty of extra room for optics and other gear along with your crossbow
Final Thoughts for Confidence in Every Shot
Sighting in a crossbow isn’t just about accuracy—it’s about confidence. A properly zeroed crossbow transforms your hunt, ensuring clean, ethical kills and more satisfying range sessions. Once zeroed, practice with a purpose. Shoot from realistic hunting positions. Keep your bolts uniform. Re-check zero often. Because when the moment comes, you’ll know your bolt will fly true.
Per our affiliate disclosure, we may earn revenue from the products available on this page. To learn more about how we test gear, click here.